

Apple always locks users into its own ecosystem. And Apple's new smart speaker – Homepod is no exception. We can only stream music on HomePod through an Apple Music subscription, iTunes purchases, or iTunes Match content uploaded to iCloud Music Library.
It seems that listening to music on HomePod is impossible if you are a Spotify, instead of Apple Music, subscriber. But actually, it's still available to play Spotify on Homepod even if you are a third-party music service subscriber just like Spotify.
Here we are going to show you two ways to listen to Spotify songs and playlists on your iPhone to Homepod step by step.
Using AirPlay is the easiest way to listen to Spotify on HomePod. But the downside of it is that you're not going to have full Siri support. You can't ask HomePod to play a certain track on Spotify like Apple Music. You can only skip tracks, play or pause music, and that's all. But at least you are able to enjoy Spotify songs on Apple's HomePod without subscribing Apple Music Service.
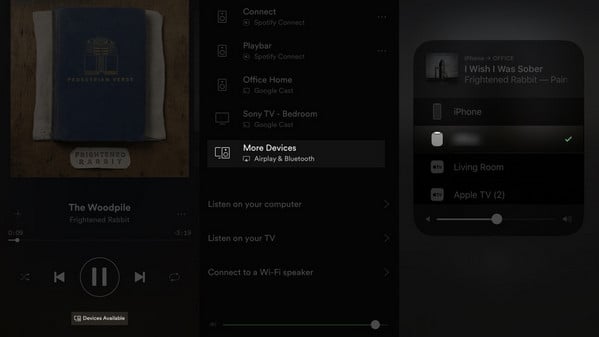
Note: Please make sure your device be on the same WiFi network as the HomePod with this method.
Method 2, which enables you to get full use of Siri support just like Apple Music, is a more perfect way to play Spotify songs on HomePod.
Using Siri, we can only control our Apple Music songs and playlists. Thus to download music from Spotify and then transfer them to iTunes Library will be a perfect solution to play Spotify on HomePod without limits. And NoteBurner will help you achieve it easily. Let's get more details:
NoteBurner Spotify Music Converter is a professional DRM removal tool specially designed for Spotify users to download and convert Spotify songs, albums, or playlists to MP3, AAC, FLAC, AIFF, WAV, or ALAC format so as to transfer them to any other devices. The program supports both Windows and macOS. Here we will take the Windows version as an example. For Mac users, please refer to How to Download Music from Spotify on Mac for detailed steps.
Step 1 Download, install and launch NoteBurner Spotify Music Converter, choose the "Spotify App" conversion mode.
Step 2 Import Tracks or Playlist
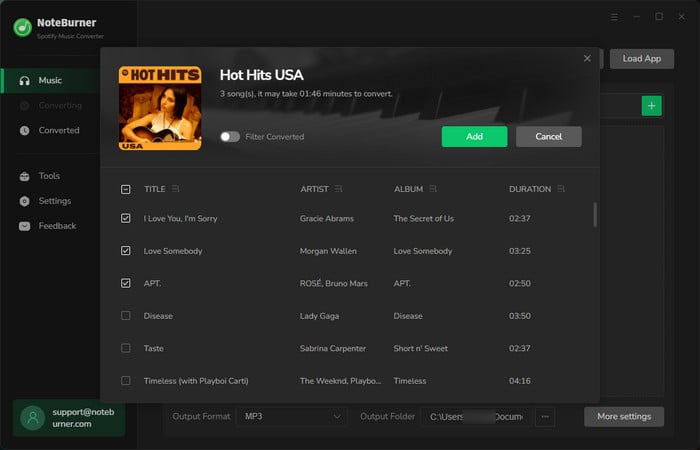
To import your music to NoteBurner, please directly drag and drop the playlist from Spotify to the rectangular box of the main interface or you can copy and paste the link and click the button "+".
Step 3 Choose MP3 as the Output Format
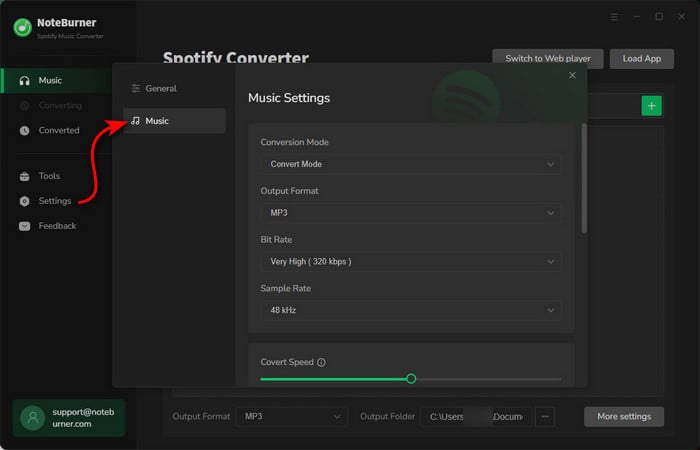
Click the  button on the bottom left to choose output format. In Convert settings, you can choose output format (MP3, AAC, FLAC, AIFF, WAV, or ALAC), conversion mode (Intelligent Mode, Spotify Record, WebPlayer Download, or YouTube Download), output quality (320kbps, 256kbps, 192kbps, 128kbps) and more.
Step 4 Download Music from Spotify to Local Computer
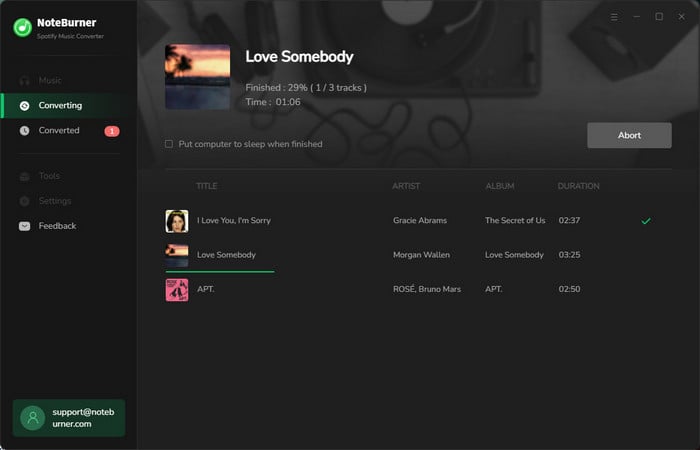
Click the "Convert" button to start downloading songs from Spotify to your Windows computer. When the conversion is done, you can find the songs by going to the output folder you customized in Step 3 or you can just click the "History" button and then click the "Folder" icon to directly go to the output folder saving the songs.
Step 5 Import Converted Spotify Songs to iTunes
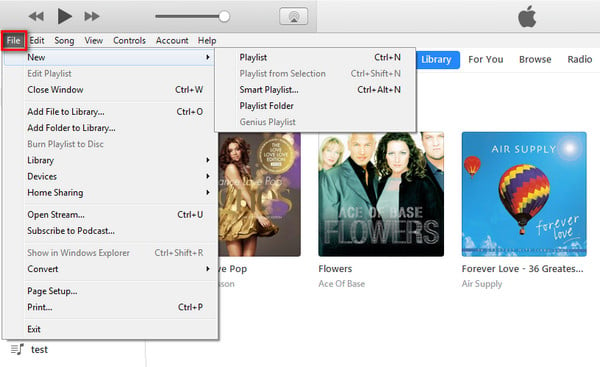
Run iTunes. Click File > Add to Library, and a pop-up window will allow you to open and import the converted Spotify music to iTunes. Then click File > New > Playlist. Now find all the converted Spotify songs in iTunes and drag them to the new playlist you've just created.
Now you can play your Spotify songs on HomePod with no limits any more as though they were Apple Music in your iTunes.
Note: The free trial version of NoteBurner Spotify Music Converter allows you to convert the first 1 minute of each song. You can buy the full version to unlock the limitation.