
Do you have rare tracks, CD rips, live recordings, or other cherished songs that aren’t available on Apple Music? Importing this local music into Apple Music not only allows you to organize it and play it alongside your streaming songs, but also sync it across your iPhone, iPad, Mac, Windows, and even Android devices. If you're looking for a solution, this article takes you step-by-step through how to import local music to Apple Music on a variety of devices. We’ll also introduce a simple and practical tool to help you fix common issues like format incompatibility, unrecognized songs, and failed syncs.
If you use a Mac, importing local music to Apple Music is a simple process, as long as your files are in a compatible format such as MP3, AAC, or WAV. Whether you download songs from the Internet, rip them from CDs, or create your own recordings, the Music app on macOS allows you to add them directly to your library. Once imported, you can organize them into playlists, edit metadata, and access them on all your Apple devices if you have synced library enabled.
Step 1 Open the Apple Music app on your Mac.
Step 2 In the top menu bar, click File, then select Add to Library or Import.
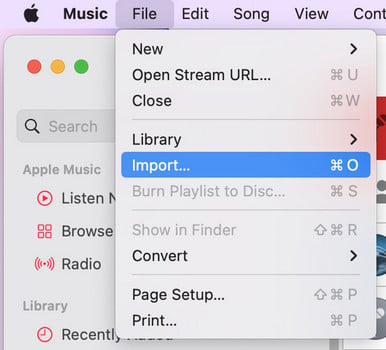
Step 3 Browse your computer and choose the music files you want to import. Click Open to begin adding them to your library.
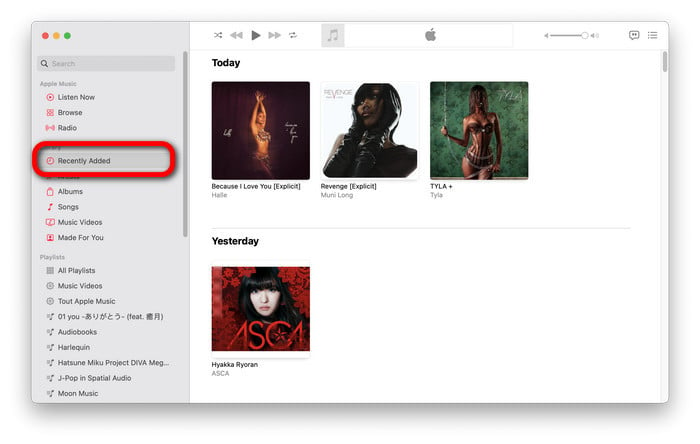
Step 4 Once added, go to the Recently Added section to find and play your imported songs.
Windows users can use iTunes to manage and add local music to Apple Music. Whether your files are purchased on other platforms or personal audio files, iTunes can easily add them to your Apple Music library. Once added, as long as iCloud Music Library is enabled, you can enjoy the tracks on your iPhone, iPad, and even Android devices.
Step 1 Open iTunes on your Windows computer and sign in with your Apple ID.
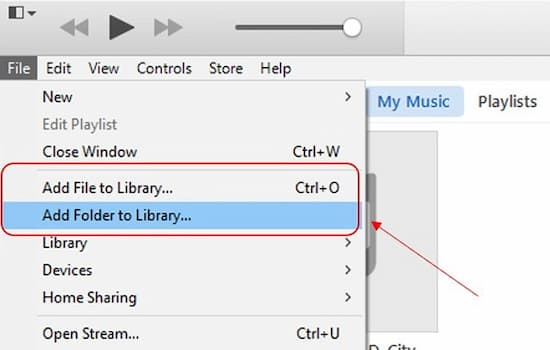
Step 2 Click on the File menu in the top-left corner, then choose either Add File to Library (for a single song) or Add Folder to Library (to import multiple files at once). iTunes will automatically scan and import all compatible music files.
Step 3 Once the import is complete, your music will appear in the iTunes library. You can find them under the Recently Added section.
Step 4 Locate the songs you just added, click the three-dot icon next to a track, and select Add to iCloud Music Library to sync them across all your Apple devices.
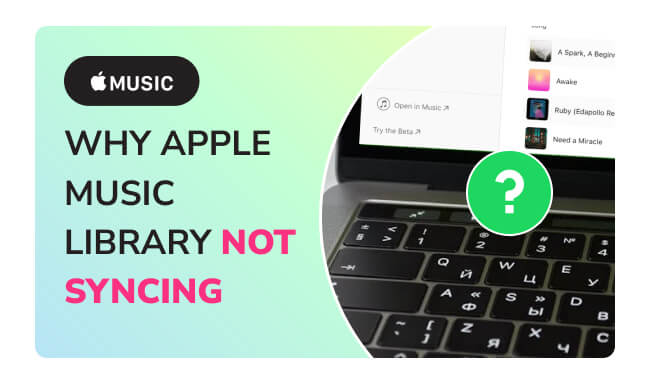
Why is the Apple Music library not syncing? Read this article, and you will be able to check out the causes of Apple Music not syncing and learn how to fix them.
Unlike desktop computers, you can't import music files directly into the Apple Music app on your iPhone or iPad, but that doesn't mean you don't have options. If you want to play local music on your iOS device, you need to sync music from your Mac or Windows computer using Finder or iTunes. Once synced, the songs will appear in your Apple Music library and can be played alongside your streaming content.
Step 1 Enable Sync Library on Your Computer
🖥️ On Mac
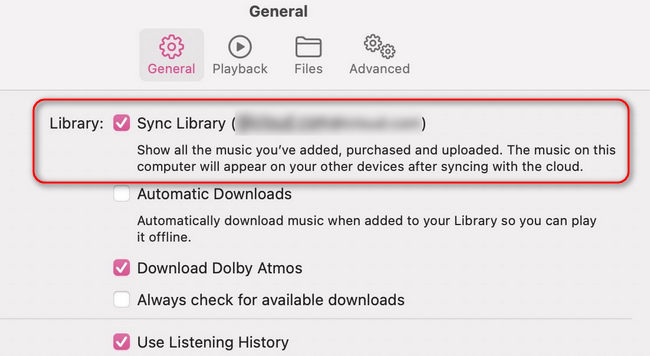
Open the Music app, go to Music > Settings > General, and ensure Sync Library is checked. Also, ensure you're signed in with your Apple ID. To check the sync status, click Updating Cloud Library at the bottom of the sidebar.
💻 On Windows
In iTunes on your PC, sign in with the same Apple ID, then go to Edit > Preferences > General and check iCloud Music Library to enable syncing.
This feature lets your Apple Music library, including local files, sync across all your devices.
Step 2 Add Local Music to Your Library
Use File > Add to Library (or Import) to add your local music files to the Music app or iTunes.
Once added, Apple will try to match them to existing songs in the Apple Music catalog:
Step 3 Enable Sync Library on Your iPhone/iPad
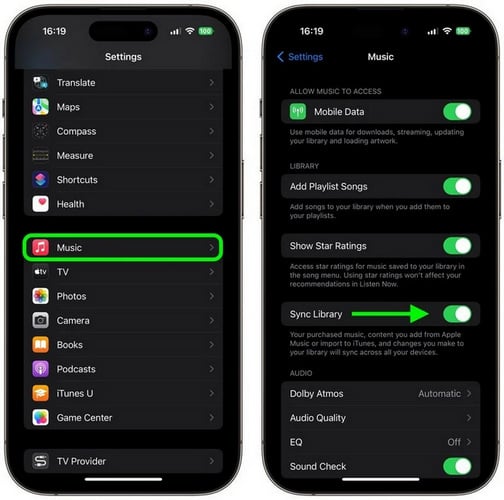
Go to Settings > Music on your iOS device, and toggle on Sync Library.
Once enabled, your local files, whether matched or uploaded, will be accessible on your iPhone or iPad through the Apple Music app.
Although you can’t add local music files directly through the Apple Music app on Android, you can still stream them on your Android device. To do this, first import the local files into Apple Music on your Mac or Windows PC, and make sure Sync Library is enabled. Once syncing is complete, your songs will appear automatically in the Apple Music app on Android as long as you're signed in with the same Apple ID on all devices.

What is the best way to sync Apple Music to Android? Compared to Apple Music for Android, NoteBurner Apple Music Converter is a preferable choice, which can also convert Apple Music.
You’ve followed all the steps to import local music into Apple Music on Mac, Windows, iPhone, and Android. But sometimes, things don’t go as expected even though you already have the files. Maybe the file format isn’t supported, the songs won’t sync, or you simply don’t have access to the tracks as local files yet. The good thing is, that you can easily solve them with NoteBurner Apple Music Converter, which offers reliable fixes for common issues.
| Issues | What NoteBurner Can Do |
|---|---|
| DRM protection blocks file import? | ✅ Remove DRM and make songs compatible |
| Format not supported by your device? | ✅ Choose flexible output formats |
| Keep music forever after unsubscribing? | ✅ Save Apple Music tracks to local permanently |
| Need better control over ID3 tags? | ✅ Preserve metadata and allow edit ID3 tags |
| Want to back up your playlists? | ✅ Batch convert Apple Music albums and playlists |

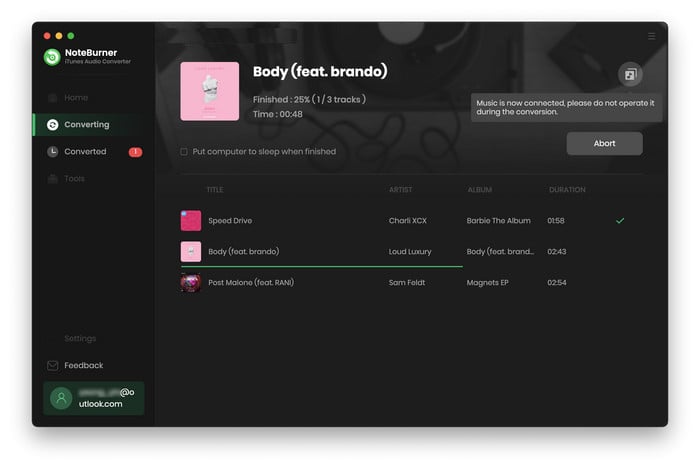
Step 1 Open the NoteBurner Apple Music Converter on your computer. Then click the "Add" button to add Apple Music you want to download to NoteBurner.
Step 2 Once you've added your desired songs, click on the "Settings" button to choose output format (MP3), output quality, output folder, etc.
Step 3 Click the "Convert" button to start converting Apple Music to MP3. Once the process is complete, head to the "History" section to find all your converted Apple Music tracks. These DRM-free files can now be transferred to any device, including Android phones, MP3 players, USB drives, and more.
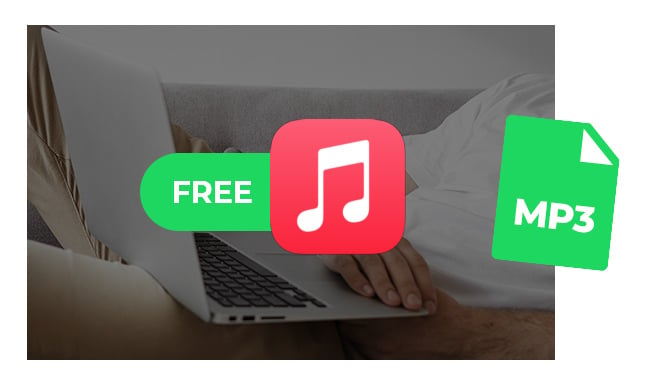
Get various online free Apple Music to MP3 downloaders on this page. You will also get an Apple Music Lossless Downloader, which contains 100% original sound quality.
A: No. "Sync Library" is only available with an active Apple Music or iTunes Match subscription.
A: ✅ Supported formats: MP3, AAC (including M4A), ALAC (Apple Lossless), WAV, AIFF.
❌ Not supported formats: FLAC, OGG, WMA.
If your file isn't supported, consider converting it to MP3 or ALAC using a tool like NoteBurner's free "Format Converter".
A: Make sure "Sync Library" is enabled on both your computer and iPhone. Also, confirm that your files are in a supported format such as MP3, AAC (M4A), ALAC, WAV, or AIFF. If you're using iTunes on Windows, go to File > Library > Update iCloud Music Library to manually refresh the sync. Also, ensure you're signed in with the same Apple ID on both devices.
A: In Apple Music or iTunes, right-click the song and select "Get Info". You can edit metadata such as Title, Artist, Album, and Genre.
By following this guide, you can easily add local files to Apple Music. If you run into unsupported formats, syncing issues, or simply want better control over your music library, tools like NoteBurner Apple Music Converter can help convert your favorite tracks to compatible formats and even download Apple Music for offline playback.
Note: The free trial version of NoteBurner iTunes Audio Converter converts 1 minute of each audio file only. If you want to unlock the time limitation, please purchase the full version of NoteBurner iTunes Audio Converter.


