

A good news for lovers of both Tesla and YouTube Music! Tesla has introduced YouTube Music as a built-in app for its Model S, X, 3, and Y in the latest update (2024.26.3). With this addition, Tesla owners can enjoy over 100 million ad-free songs simply by logging into their YouTube Premium account. They can also access their favorite tracks, subscribed playlists, artists, and podcasts directly from their vehicles.
To use YouTube Music on Tesla, a YouTube Music Premium account is required, along with Tesla's $10/month Premium Connectivity feature or a Wi-Fi/hotspot connection. Generally speaking, Tesla rolls out software updates first to North American owners, followed by gradual releases to other regions. This article also provides you with alternative methods to play YouTube Music on Tesla if your region hasn't received the update yet.
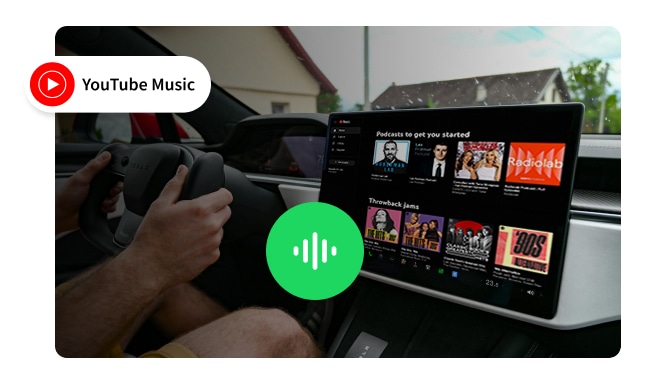
If the 2024.26.3 update has been released in your region, just follow the following instructions to connect YouTube Music to Tesla.
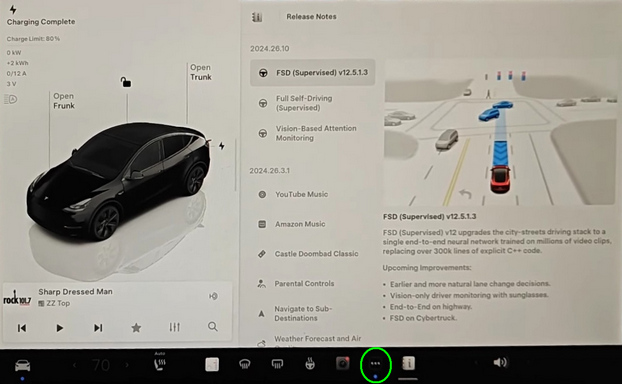
Step 1Tap the 3 horizontal dots at the bottom to find the YouTube Music icon and select it.
Step 2Scan the QR code with your mobile phone or go to yt.be/activate to sign in.
Note: Please make sure that you have a YouTube Premium/YouTube Music Premium and Tesla Premium Connectivity plan or a Wi-Fi/hotspot connection before signing in.
Step 3If you go to yt.be/activate, after filling out your personal information, confirm the 2-step verification.
Step 4Select the content you allow Tesla to access.
Now you have connected your YouTube Music account to your Tesla vehicle, and you can enjoy them when you're driving. If you don't have YouTube Premium/YouTube Music Premium, method 2 to method 4 will let you play YouTube Music on Tesla without Premium.
Apart from using YouTube Music directly on the Tesla, another simple method is to play YouTube Music through Bluetooth on your mobile phone. Once a phone is paired, Tesla can connect to it whenever the phone is within range. Here is a guide for you:
Step 1Navigate to "Settings" on your phone, choose "Bluetooth", and open the Bluetooth pairing mode.
Step 2Tap on the grey Bluetooth icon in the top right corner of Tesla's touchscreen, tap "Add New Device +" and then select "Start Search".
Step 3Choose your phone from the list of Bluetooth devices displayed on the screen and confirm on your phone.
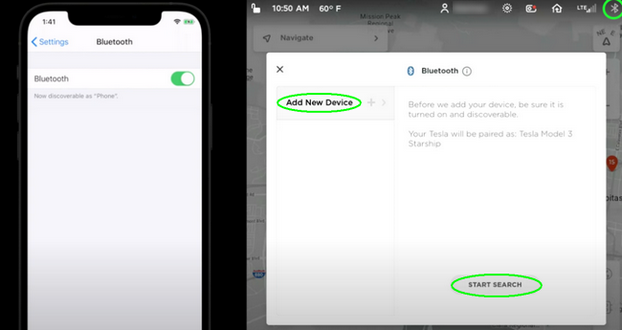
Once connected your phone to Tesla, you can play YouTube Music tracks on your phone, and then you will hear them through Tesla's Media Player. Besides, you can control the playback by using the next and previous icons in Tesla's Media Player easily.
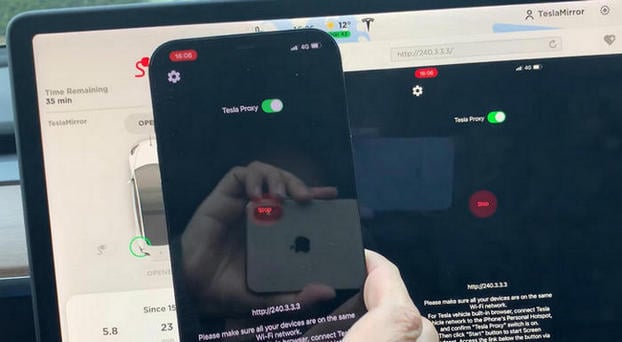
TeslaMirror/TslaMirror is an app that will help your mobile(iPhone/iPad/Android) app mirror to Tesla vehicle. On Android, it is TeslaMirror. On iOS, it is TslaMirror.
Step 1Install the TeslaMirror/TslaMirror app on your mobile phone and Tesla.
Step 2Connect the Tesla car's network to the iPhone's Personal Hotspot.
Step 3Connect TeslaMirror to your Tesla. Then the screen of your mobile devices will be mirrored on your Tesla's touchscreen.
Tesla allows you to insert a USB drive to play MP3s directly from their device, which means you can also play YouTube Music on Tesla through USB, and your first step is to convert YouTube Music playlists to MP3. Tesla Model S, 3, X, and Y all have two USB ports in the front compartment of the center console. Once the drive has been inserted, you can access your music through a new USB icon in the launcher.
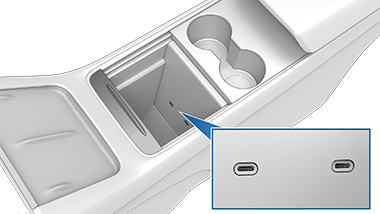
Note: Tesla Media Player supports USB flash drives with exFAT formatting (NTFS is not currently supported).
To convert YouTube Music songs, albums, or playlists to MP3, the best way is to use NoteBurner YouTube Music Converter. NoteBurner YouTube Music Converter helps users download playlists and songs from YouTube Music on Windows and Mac computers. Both YouTube Music Free & Premium users can use it to convert YouTube Music playlists to MP3, AAC, WAV, FLAC, AIFF, or ALAC format with the original audio quality. You can easily add YouTube Music to a USB flash drive or import them to other devices and streaming services like Spotify, Amazon Music, and Deezer.

Next, let's look at how to download YouTube Music to MP3 with NoteBurner.
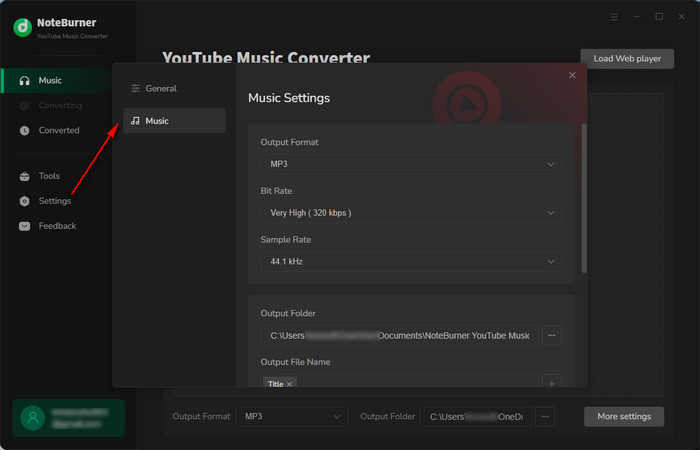
Step 1Select MP3 as the Output Format
Click on the "Settings" icon. And you can adjust the "Output Format" (MP3/AAC/WAV/FLAC/AIFF/ALAC), "Bit Rate" (320kbps, 256kbps, 192kbps, 128kbps), "Sample Rate", and so on. Here you should select the output format as MP3.
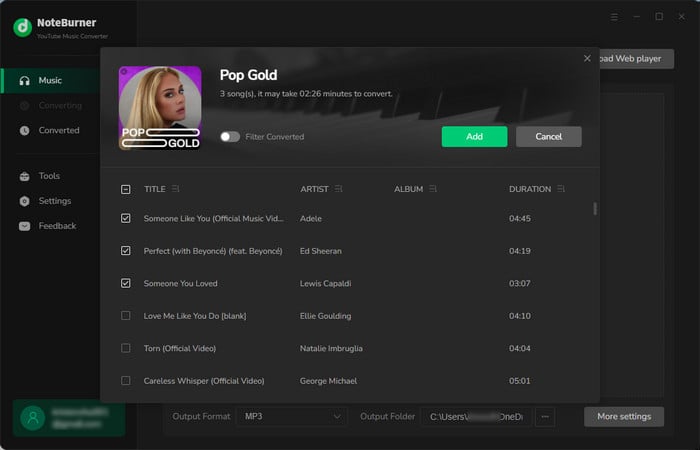
Step 2 Add YouTube Music to NoteBurner
Simply open one of your desired YouTube Music playlists on NoteBurner, tick the songs you want to download, and then tap the "Add" button.
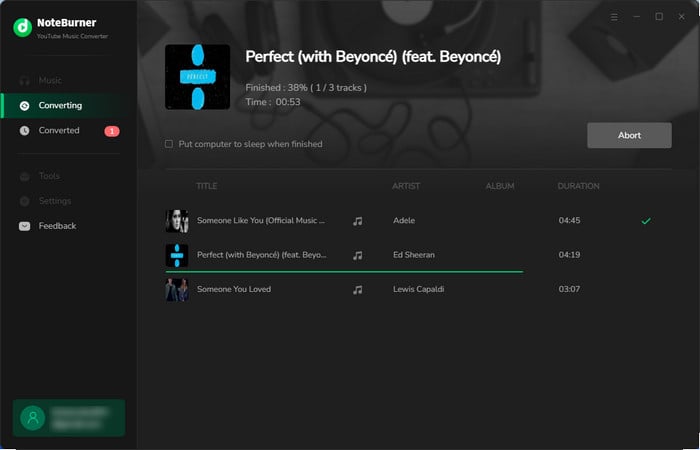
Step 3 Start Converting YouTube Music Playlist to MP3
Tap on "Convert" to start downloading YouTube Music as MP3 files. Once completed, the MP3 files will be saved to your local computer.
Step 4 Locate YouTube Music Files
Once converted, you can just tap on the "History" icon (which looks like a clock) on the left side of the app, hover over the history list, and click "Folder". Then you'll be directed to the downloaded YouTube Music streaming files.
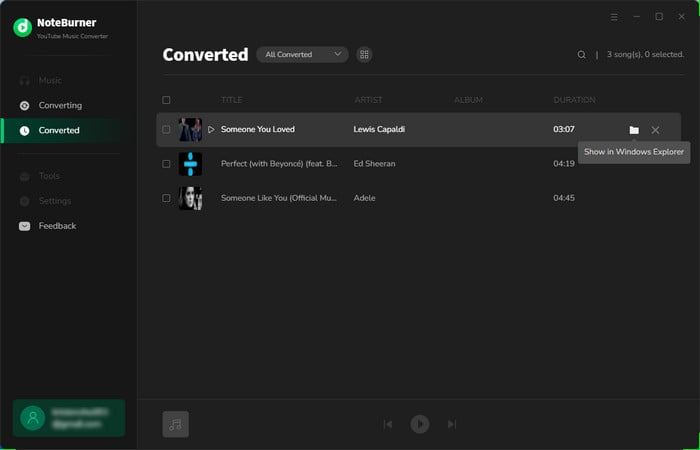
Step 5 Transfer YouTube Music Downloads to USB Drive
1. Insert a USB flash drive into your computer. After the computer recognizes it, open it by double-clicking.
2. Go to the folder of your downloaded YouTube Music files, press "Ctrl + A" to select all, right-click on the files and click "Copy".
3. Go back to the window for your USB, right-click, and "Paste". Wait a little while, YouTube Music will be all moved over to the USB.
You can now play YouTube Music on Tesla through the USB!
The call from many Tesla owners to add YouTube Music to Tesla's app has finally come true. As long as you have a Premium account, you can easily enjoy YouTube Music on Tesla vehicles (Model S, X, 3, and Y). It's worth noting that this article also offers 3 feasible methods and detailed tutorials for Tesla owners who don't have a Premium membership. No matter how you choose to listen, hope you have a fantastic driving experience enjoying YouTube Music on your Tesla!
Note: The free trial version of NoteBurner YouTube Music Converter allows you to convert the first 1 minute of each song. You can buy the full version to unlock this limitation and enable all its features.