

As a leading platform in the era of music streaming, Apple Music has provided smooth and intuitive sharing options that enable users to share their favorite playlists with friends and other music lovers with ease. Wanna know how to share your meticulously curated Apple Music playlist? Keep reading, and this guide will walk you through a step-by-step process.
There must be more than one type of music you like. Categorizing all your favorite songs by creating different playlists makes it more convenient for you to manage them. After reading this part, you can freely create Apple Music playlists on your computer and iOS devices. The steps are quick and simple, let's check them out.
Step 1: Launch Music/iTunes on your Mac/PC and find a song you want to start a playlist with.
Step 2: Right-click the song or tap on the ellipsis button (the three dots) and choose "Add to Playlist" > "New Playlist".
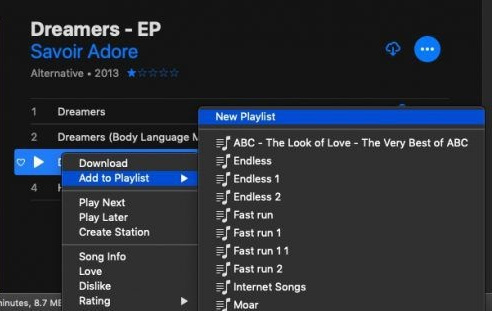
Step 3: Click the name to change the title, and click the placeholder cover image to add one. To add a description, just click the blue ellipsis button and choose "Add Description".
Step 4: Add more songs to your new playlist. You can browse your library or the Apple Music catalog, or use the search field to find the song you want.
If you find a song that you want to add to the playlist later, simply click the ellipsis button and select "Add to Playlist" > [Your New Playlist]. You can also import playlists from others on Apple Music by going to "File" > "Library" > "Import Playlist".
Step 1: Open the Music app on your iOS device and find a song you want to start a playlist with.
Step 2: Long press on the song. Choose "Add to Playlist" -> "New Playlist".
Step 3: Name your playlist, and add a description, and a cover image if you want.
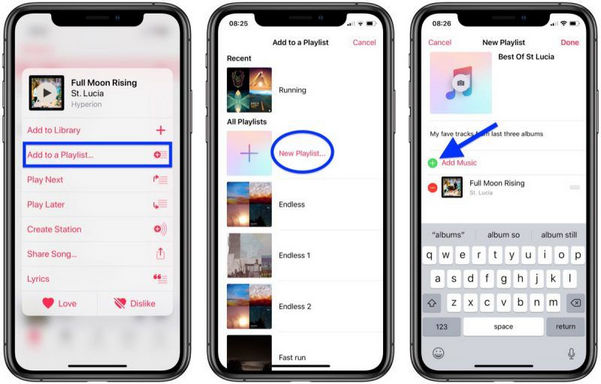
Step 4: Locate the "Add Music" option, and then use the search field to find songs in your library or the Apple Music catalog, or browse through songs in your collection below.
Step 5: Tap on the plus (+) button when you find it that you want to include. Besides, you can do this for multiple songs.
Step 6: Select "Done" when you're finished adding songs.
Now you've learned how to create a playlist on Apple Music, go organize your library right away!
"I can't share a playlist in Apple Music after the 14.5.1 upgrade!! "
Apple Music still allows users to share playlists through social media, Messages, and copying links. You can actually share playlists on Apple Music with anyone.
However, since the Apple Music update, you've had to create your profile before you can share a playlist.
On your profile, your favorite playlists will be prominently displayed, and you can follow friends to see what they're listening to as well. Then let's take a quick look at how to create your Apple Music profile.
Step 1: Launch the Apple Music app on your device.
Step 2: Tap on the profile icon on the upper right corner.
Step 3: Select "Set up Profile", then tap on "Get Started".
Step 4: Follow the onscreen prompts, including selecting a username, and finding contacts, and you can now determine the playlists you want to display on your Apple Music profile.
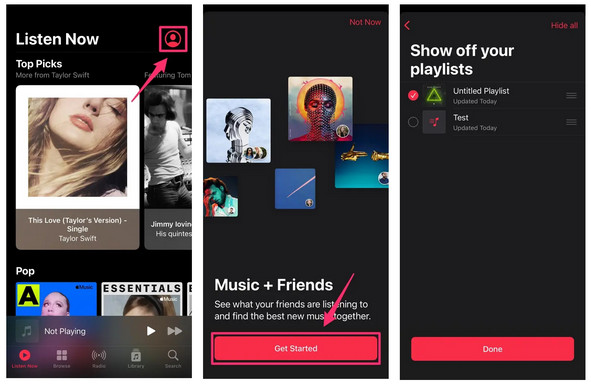
Once you've made sure your Apple Music profile is created, you can share your playlists on Apple Music with others in just a few simple steps.
Step 1: Open the Apple Music app on your device.
Step 2: Tap on "Playlists" in the Library tab. You can not only share the ones you create but also playlists that already exist in the Apple Music app.
Step 3: Choose the playlist you want to share.
Step 4: Tap on the three-dot icon in the top right corner, then select "Share Playlist".
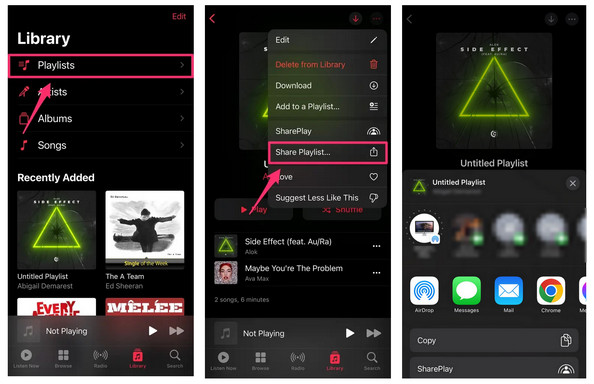
Now you can share it with others through AirDrop, Messages, Mail, or just simply copy the link.
Although Apple Music has a huge music library, there are always some original songs that are only on a certain streaming media and are not provided by Apple Music. At this time, merging the Apple Music playlist with the playlists of other platforms is the best choice. To make your playlist more complete, you can opt for sharing Apple Music playlist to any other music service. To do so, you need to use a tool - NoteBurner Apple Music Converter, a reliable and effective Apple Music playlist downloader.
Of the numerous newly available Apple Music converters, NoteBurner is the most often used. With just a few clicks, you can save any song from Apple Music as a local MP3/AAC/WAV/FLAC/AIFF/ALAC file thanks to its straightforward interface and special music-converting core. Additionally, this tool will also impress you with its powerful features, fast conversion speed, and lossless output audio. With the help of this powerful tool, you can effortlessly download playlists from Apple Music and share them to any music service.
In this guide, you will learn how to share Apple Music playlists to any music service. As space is limited, this part will take Spotify and Amazon Music as examples. Please download NoteBurner Apple Music Converter before getting started.
Step 1 Launch the program and just select "Apple Music web player".
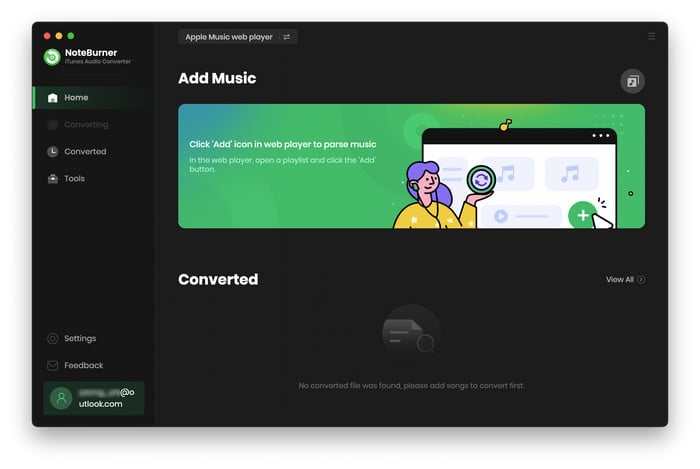
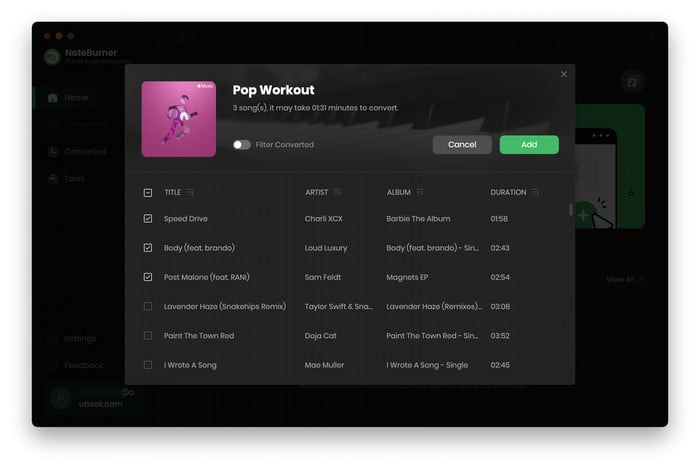
Step 2 Open a playlist on the Apple Music web player, and tap the "Add" icon. There will be a pop-up window showing you the audio files you want to record.
Step 3 Go to "Settings", and then there will be a pop-up window that allows you to set the output folder and output format. Here you can set "MP3" as the output format. You are also able to customize output quality and conversion speed.
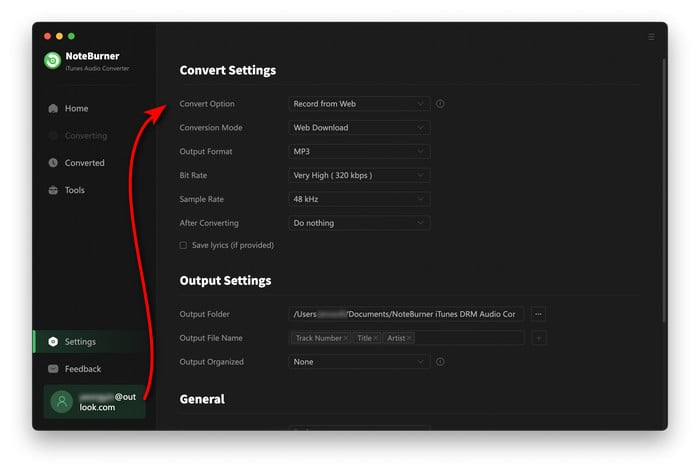
Step 4 After finishing customization, click "Convert" to start the conversion process. NoteBurner will automatically record and convert all Apple Music songs.
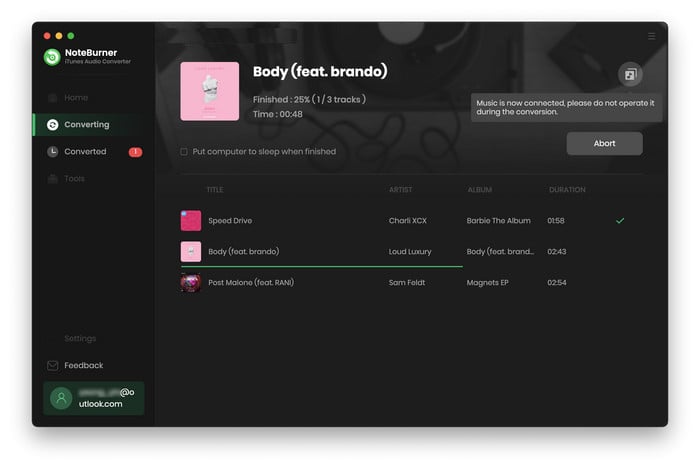
Step 5 Once done, tap on "Converted" and you will find the converted MP3 audio files in the folder you set. Besides, ID3 tags such as the track's title, artist, album, and duration will be preserved as well.
Now, all the converted Apple Music playlists are converted and saved to your computer. The steps to share the playlist to different music services are different, the following part will show them separately.
Step 1: Open Spotify on your computer.
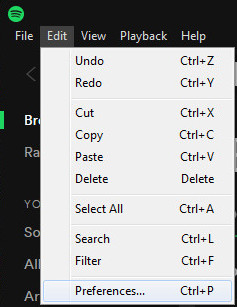
Step 2: Click the "Edit" button in the top right corner. Tap on "Preference" to find "Local Files".
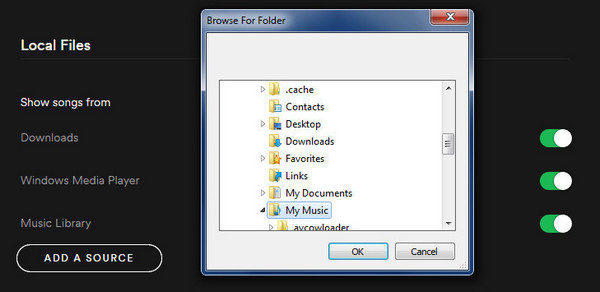
Step 3: Click "ADD A SOURCE", and a window will pop up. Choose the folder you saved the converted playlist with NoteBurner Apple Music Converter, then click "OK" to import the files.
In 3 simple steps, you finish sharing Apple Music playlist to Spotify. Now you can listen to Apple Music playlists on Spotify. Then manage your music songs within Spotify and you can enjoy all your favorite music in the same playlist.
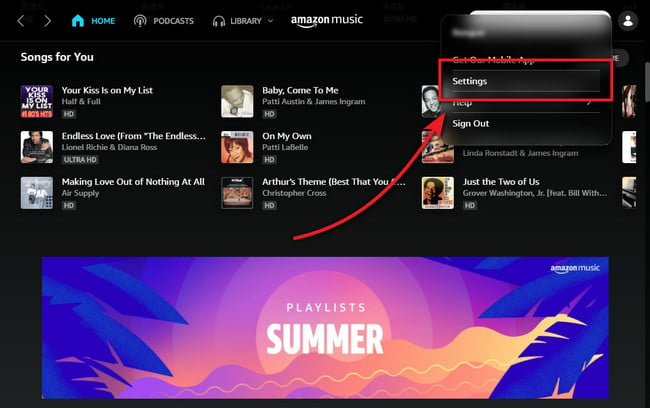
Step 1: Launch the Amazon Music app on your computer, and direct to the "Settings" button.
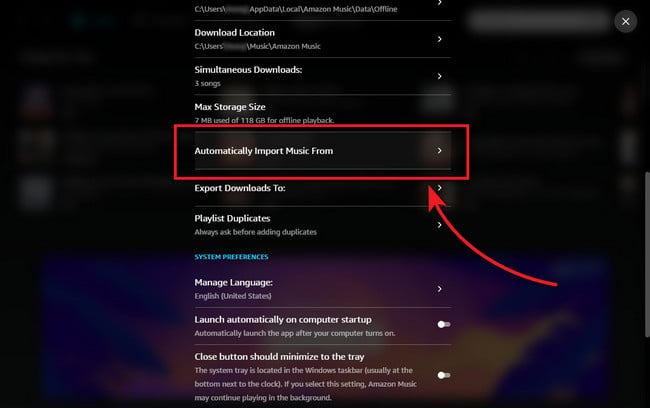
Step 2: Scroll down and tap on "Automatically Import Music From", and "Select Folder". Then locate the Apple Music local playlist file you've just downloaded.
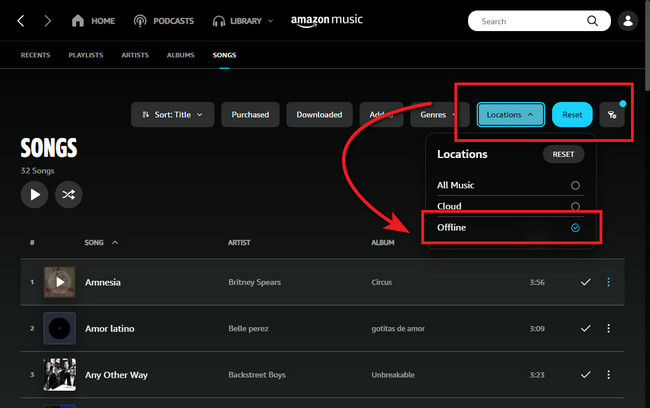
Step 3: To share Apple Music playlists on the Amazon Music app, just go to "Library > Music", then filter the offline music tracks at the "Location" section.
Now, you've successfully shared Apple Music playlist to Amazon and you can add them to the playlist with the same genre on Amazon Music.
To start a collaborative playlist, create a new playlist or open one you've already made. Afterward, tap the Collaborate button or hit the ellipsis (•••) and then "Collaborate."
Yes. You can share individual songs, albums, or playlists through email. Copy the link and paste it into an email then you can send it. When you click the link, the music opens in Apple Music on the web.
Yes. Your friends can follow you and then they will see the playlists you create on your profile unless you turn off those playlists you don't want to share.
While you can share the playlists with non-subscribers, they will only be able to play songs from that playlist that they own.
The person who came up with the feature of the playlist was truly innovative. Playlist helps people to better manage different genres of music. They bring people together who share similar musical preferences. Playlists also make it easy to share people's favorite tracks with friends and family, and to learn about their musical tastes as well.
Nearly every question a music lover could have about playlist is covered on this page. From how to create an Apple Music playlist, to how to share playlists on Apple Music, and what might get in the way of sharing it, to how to share Apple Music playlists to any music service, this page has gone over everything in depth.
It is worth mentioning once again that NoteBurner Apple Music Converter enables you to share your customized playlists freely. With its help, you can enjoy your playlists anytime, anywhere, and share them on any music service to better manage your playlists. Give it a try, it'll be your right hand.
Note: The free trial version of NoteBurner Apple Music Converter converts 1 minute of each audio file only. If you want to unlock the time limitation, please purchase the full version of NoteBurner Apple Music Converter.
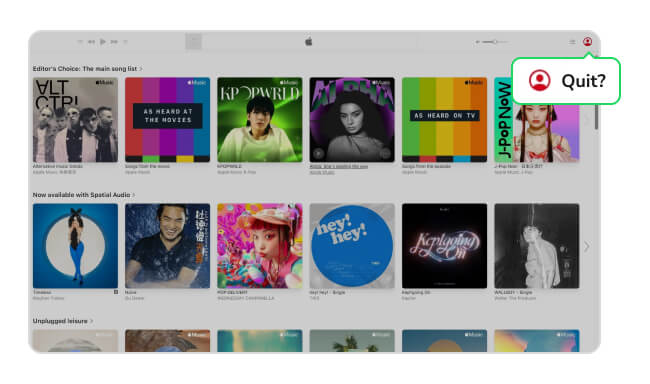
This article will cover how to log out of Apple Music on a variety of devices including iPhone & iPad, Android, Mac, Windows, web browser, and other devices.